
Posted: October 6, 2025
 Changing your furnace filter is one of the easiest yet most important maintenance tasks you can perform as a homeowner. This simple 10-minute job can dramatically improve your indoor air quality, reduce energy bills, and extend your furnace’s lifespan.
Whether you’re a first-time homeowner or just want to brush up on proper technique, this guide will walk you through the entire process.
Your furnace filter serves as the first line of defense against dust, pollen, pet dander, and other airborne particles. A dirty filter forces your system to work harder, leading to higher energy costs and potential equipment failure. Regular filter changes can reduce your heating bills by up to 15% while ensuring your family breathes cleaner air.
Before starting, gather these essential items:
Pro tip: Purchase filters in bulk to save money and ensure you always have replacements on hand.
Step 1: Turn Off Your Furnace
Safety first—switch off your furnace at the thermostat and the main power switch. This prevents the system from cycling on while you’re working and protects both you and your equipment.
Step 2: Locate the Filter
Most furnace filters are located in one of three places:
Use your flashlight to examine these areas if you’re unsure of the location.
Step 3: Remove the Old Filter
Carefully slide out the old filter, noting which direction the arrows on the frame are pointing. These arrows indicate airflow direction and must point toward the furnace. Take a photo if it helps you remember the correct orientation.
Step 4: Check the Filter Condition
Examine your old filter. If it’s gray or brown and you can’t see through it when held up to light, it definitely needed changing. This visual inspection helps you determine if you should change filters more frequently.
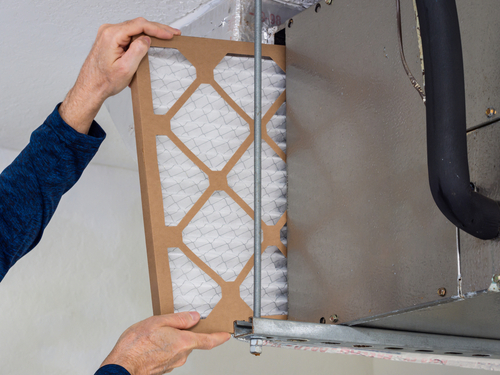
Step 5: Insert the New Filter
Remove the new filter from its packaging and slide it into place, ensuring the arrows point toward the furnace. The filter should fit snugly without forcing it—if you encounter resistance, double-check the orientation and size.
Step 6: Restore Power and Test
Turn your furnace back on at both the power switch and thermostat. Listen for normal operation sounds and check that air flows properly through your vents.
Filter replacement frequency depends on several factors:
Homes with pets, smokers, or family members with allergies may need more frequent changes. Check your filter monthly during peak heating season to determine the best schedule for your household.
While changing filters is a straightforward DIY task, comprehensive furnace maintenance requires professional expertise. Annual tune-ups can identify potential issues before they become costly repairs and ensure your system operates at peak efficiency.
For homeowners in Millbrook, NY, and throughout the Hudson Valley, Kimlin Energy Services provides trusted furnace maintenance, repairs, and installations. Our cost-effective service plans include annual maintenance tune-ups and coverage for many parts and labor costs, giving you peace of mind throughout the heating season.
Regular filter changes combined with professional maintenance create a winning combination for home comfort and energy savings. This small investment of time and money pays dividends in lower utility bills, improved air quality, and extended equipment life.
Maintaining your furnace doesn’t have to be complicated. Start with regular filter changes and partner with experienced professionals for comprehensive care. Your family deserves reliable comfort, and your wallet will appreciate the energy savings that come from a well-maintained heating system.
Ready to take the next step in furnace care? Contact Kimlin Energy Services to learn more about our service plans and how we can help keep your home comfortable throughout every season.